You have cleaned up your contacts, removed the duplicates, and updated the outdated entries. Now what? Without a way to categorize and find the right people quickly, even a clean contact list can feel overwhelming. That is where tagging and grouping come in.
Tags and groups transform a flat list of names into a structured, searchable network. Instead of scrolling through hundreds of contacts to find your old college roommate or your freelance designer, you simply pull up the right group and there they are. This guide shows you how to build a contact tagging system that actually works and one you will stick with over time.
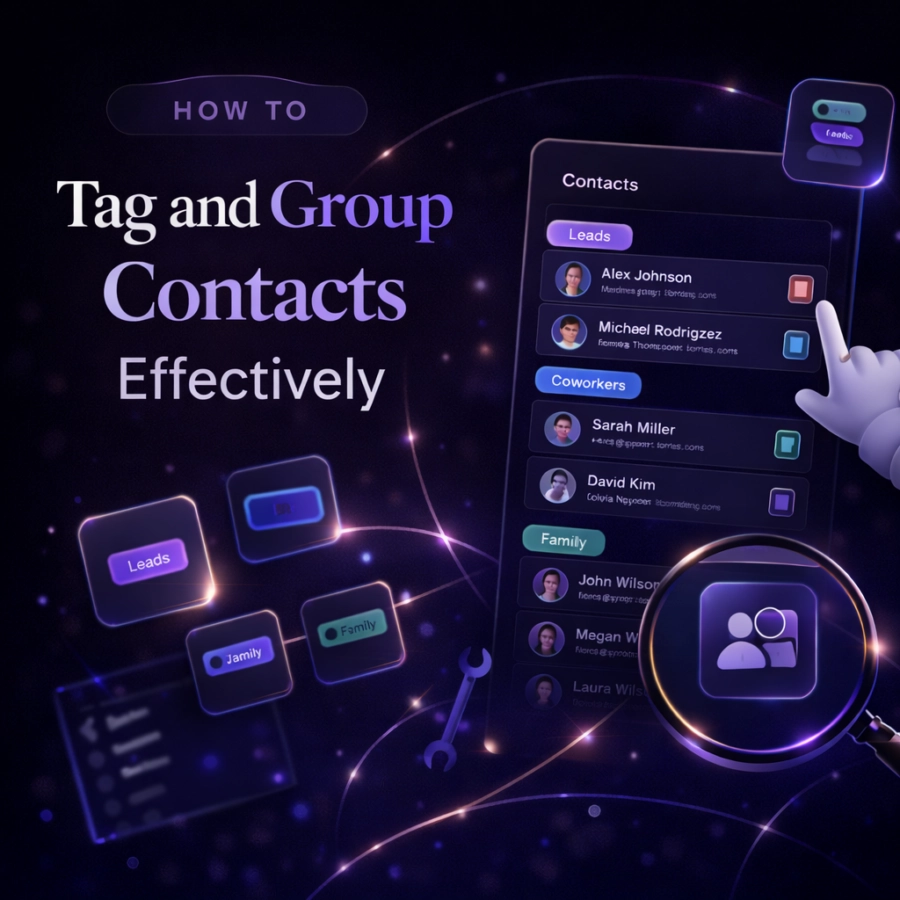
Tags vs. Groups: What is the Difference?
Table of Contents
Before setting up your system, it helps to understand the distinction between tags and groups, because they work differently depending on the tool you use.
Groups (sometimes called “labels” in Google Contacts) are like folders. A contact belongs to one or more groups, and you can view everyone in a group at once. Groups are great for broad categories: Family, Work, Clients, Friends.
Tags are more flexible. Think of them as sticky notes you can attach to a contact. A single contact might have the tags “College,” “Marketing,” “San Francisco,” and “Potential Collaborator.” Tags let you filter and search in more nuanced ways than groups alone. Some tools support both groups and tags, while others use one or the other. The underlying principle is the same: you are adding metadata that makes your contacts easier to find and manage.
Why Most People Skip Tagging (and Why That is a Mistake)
The biggest reason people do not tag their contacts is that it feels like extra work with no immediate payoff. When you save a new contact, you just want to get the number in your phone and move on. Adding tags feels like homework.
But the cost of skipping this step compounds over time. Six months later, when you are trying to remember the name of that designer you met at a conference, or you want to invite everyone from your running group to a race, you are stuck scrolling and guessing. The 10 seconds it takes to add a tag when you save a contact saves you minutes (or hours) of searching later.
The trick is building a system that is simple enough that tagging becomes second nature rather than a chore.
Step 1: Define Your Core Categories
Start by identifying the five to ten broad categories that cover most of the people in your life. These will serve as your primary groups. For most people, a good starting set looks something like this: Family, Close Friends, Social Friends, Work Colleagues, Clients or Customers, Professional Network, Services (doctors, lawyers, tradespeople), and Neighbors or Local Community.
You do not need to get this perfect on the first try. Start with categories that feel obvious and natural, and refine them as you go. The important thing is to keep the number manageable. If you have more than 15 core categories, you have too many and will struggle to assign contacts consistently.
Step 2: Add Contextual Sub Tags
Once your core categories are in place, add more specific tags for the contexts that matter in your life. These sub tags provide the nuance that makes your tagging system truly powerful.
For professional contacts, useful sub tags might include the company name, the industry they work in, where you met them, or the specific project you collaborated on. “Met at SXSW 2026,” “Fintech,” or “Freelance Designer” all give you ways to find the right person when you need them.
For personal contacts, consider tags based on shared activities or contexts. “Book Club,” “Soccer Team,” “High School,” or “Neighborhood Block Party” help you quickly pull up the right group of people for the right occasion.
Location based tags can also be useful, especially if you travel frequently or have contacts spread across different cities. Being able to pull up everyone you know in Portland when you are planning a trip there is incredibly handy.
Step 3: Tag Contacts at the Point of Entry
The most important habit in contact tagging is doing it immediately. When you save a new contact, take an extra 10 to 15 seconds to add the relevant tags right then and there. This is when the context is freshest in your mind. You know exactly who this person is, where you met them, and why they are in your phone.
If you wait until later to tag your contacts, you will face two problems. First, you will forget the context that makes the tags useful. Second, you will end up with a backlog of untagged contacts that feels overwhelming to process, and you will probably never do it.
Make it a rule: no contact gets saved without at least one tag. This simple habit is the difference between a tagging system that works and one that falls apart within a week.
Step 4: Use Tags for Relationship Management
Beyond just organizing your contacts, tags can serve as a powerful relationship management tool. Consider creating tags that reflect the status or priority of your relationships.
A “Stay in Touch” tag for people you want to contact regularly, even when there is no specific reason to reach out, keeps important relationships from fading. A “Follow Up” tag for people you owe a response or an action item helps you stay accountable. A “New Connection” tag for people you recently met reminds you to nurture those fresh relationships before they go cold.
Some people also use tags to track relationship history. Tags like “Introduced by Sarah” or “Met at Dave’s Wedding” create a web of connections that helps you understand how your network fits together. This kind of context is what separates a simple contact list from a true personal CRM.
Step 5: Keep Your System Clean
A tagging system needs maintenance just like the contact list itself. Over time, you may create tags that overlap, tags that are too specific to be useful, or tags that no longer apply to your life.
Every few months, review your tags and consolidate any that are redundant. If you have both “Marketing” and “Marketing People,” pick one and merge them. If a tag applies to only one or two contacts, consider whether it is worth keeping or if those contacts can be adequately described by existing tags.
Also review whether your core categories still make sense. Life changes, and your tagging system should change with it. If you switched careers, some professional categories might no longer be relevant. If you moved to a new city, your location based tags need updating.
Tagging Tools: What Works Best
The built in contacts apps on most phones support basic grouping, but they are often clunky when it comes to flexible tagging. Google Contacts uses “Labels” that function like groups, and you can assign multiple labels to each contact. Apple Contacts supports groups but requires you to use iCloud.com or a third party app to create and manage them, which is not ideal.
For a more powerful and intuitive tagging experience, a dedicated contact management app makes a significant difference. Dextr was built specifically for people who want to organize their contacts with rich tags, notes, and relationship context, all from a simple mobile interface. It takes the concept of contact groups and makes it actually practical for everyday use.
How Dextr Solves Contact Tagging Challenges
Dextr makes tagging and grouping contacts as natural as saving them in the first place. The app is designed around the idea that every contact is part of a relationship, and that organizing those relationships should take seconds, not minutes.
With Dextr, you can create custom tags that match exactly how you think about your network. Add tags when you save a contact, attach notes with context about how you met and what you discussed, and set follow up reminders so no relationship falls through the cracks. The app also helps you visualize your network by groups, making it easy to see who you have been in touch with and who might need your attention.
If your current contact system has you scrolling and guessing every time you need to find someone, Dextr offers a better way.